The days are getting long and warm. Perfect to stay outside longer the day.
Pefect to run trains late night. My Christmas train has some interia lights – so a great time to run the train outside in the sunset.
Another saturday, but this time I havetime left and the weather is dry and not too hot. So a perfect day to proceed working on the garden railway.
Anonther 4 meter (12 feet) of track laying are done and the bridge is getting connected. First task was filling the gravel and laying doen the concrete bricks as base for the tracks. Then installing the tracks by drilling holes into the concrete bricks and screwing the tracking to it. Finally filling the tracks with gravel.
I also did some wiring. As you may remember from previous posts, I install power supplies every 2-3 meters (6 to 9 feet). I also finally connected the tracks to the transformator, which delivers permanently the tracks with 18 volts AC. This transformator can get turn on and off by a Raspberry Pi, which is installed in the garage. But this is a different story.
The last days I developed another board to control the rail joints. The old board uses just diods to the a positive or negative voltage to switch the joints. So it is delivering only every second half wave at its output. The new board is having a bridge rectifier. So it produces both halfwaves to switch the joint – the power is doubled with this new board. I connected it to my WIFI relay board and tested it. The difference is pretty awesome! The joints are now switched without any issues.
Finally I have some hours left to enjoy todays work. So I made some pictures with steam loco Stainz and the christmas train 😉
The meteorolists were right: it was getting a warm and sunshiny springday! Hurray! ![]()
Today some concrete work again. The bridge got on it’s final place and filled up with concrete. As soon as it dryed out, it is getting rock solid. You may wonder, why the wall before the bridge is lower than the bridge itself… That’s because I have to add two additional rows of jigstones afterwards. Otherwise I wound not being able to install the bridge and fill it up with concreate. So some additional work to do for the next few days.
The concrete base for the bridge is build. I put round about 100kg of concrete into the earth in order to get a solid and stable base for the bridge. I also added some iron in it to get the pylons rock solid. Maybe the iron is still to long. But then I will cut them down to the right length/height.
Tomorrow will be (hopefully) good weather. That’s at least, what the meteorolists are telling us. Maybe the concrete is already that dry, that I’m able to put the pylons on it and fix them with some cement, before filling them up with concrete as well….
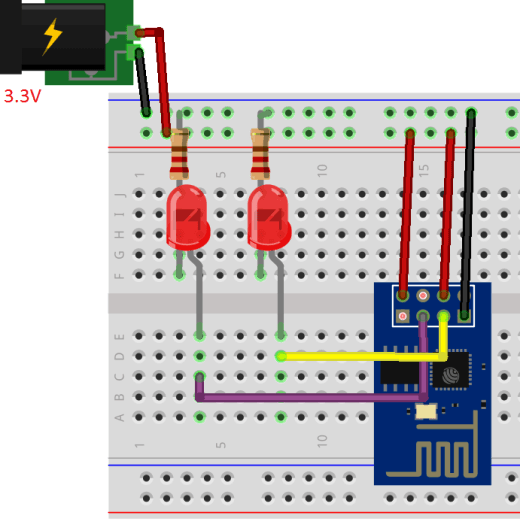
First ideas to create signals for the railway. I simply want to control a green and a red LED with it, without any additional functionallity. So it looks like it’s getting pretty easy and cheap to get this realized. Just need an additional power supply to get 18VAC to 3.3VDC. That’s it….
A good project description is here…

Another nice saturday – so time to proceed to work in the garden. So I build the basement for further tracks and installed the thrid joint of the station. That was a little tricky, because I had to lengthen the tracks to fit. Anyway – I got it done 🙂
As you may know from some previous posts, I install some entry points for the power supply every 2 to 3 meters (6 to 9 feet). Inbetween the entry points I have put a tube into the gravel, that is usually used for electrical installations. I try to keep it straight. So it’s getting a nobrainer to push the cables in after the entry points are fixed.
Received again some metal plates to seperate gravel from dirt. So I knocked them vertical into the dirt, shaveled out the earth in between, put a liner below and put the first layer of gravel above.
I temporarlely layed the joint above in order to see, if the markers are placed in the right position.
It still looks like a huge construction set, but as soon as the tracks are layed and some plants are set, it will look awesome. At least in my mind already…