Inspired my Mark Found’s tv series “The Garden Railway”, I started building my own garden railway in my backyard. It is build right from the scretch.
I created this blog in order to share my experiances to interrested people, who also want to start with building up their own garden railway in their own backyard. So every comment and feedback it apreciated.
A garden railway is a great possibility to combine nature and technic in a home environment. It is also a great hobby to free up the mind from daily business. And it is completely different to smaller inhouse scales, because everyone starting with this hobby has also think about weather and stability, security and many other impacts. Working with garden railways needs rockery work, concrete mixing, gardening, and way more.
Please enjoy my little blog. I hope, that I am able to share some good inspirations.
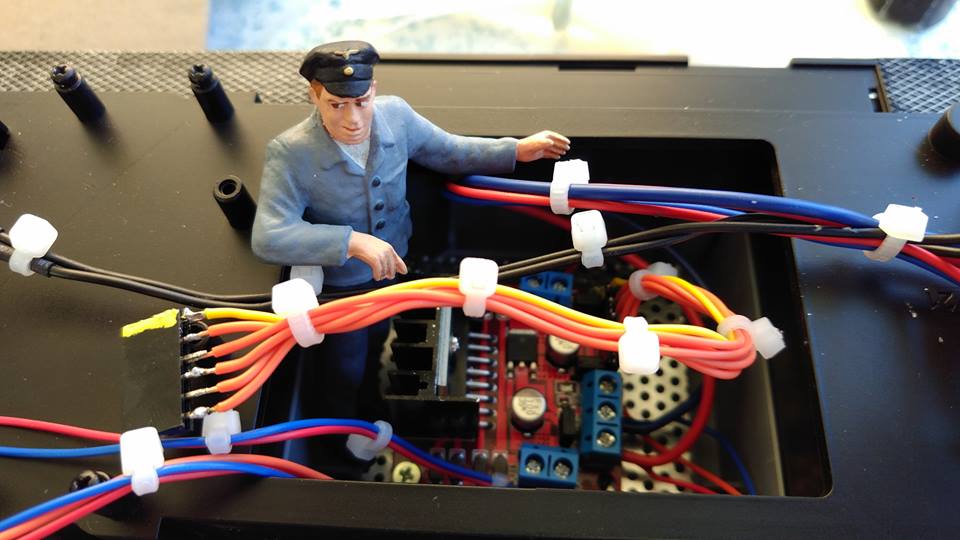
I placed the nodeMCU into my locomotive. So the heart (power buffer), the legs (motor amplifier) and the brain (microcontroller) is now imbedded.
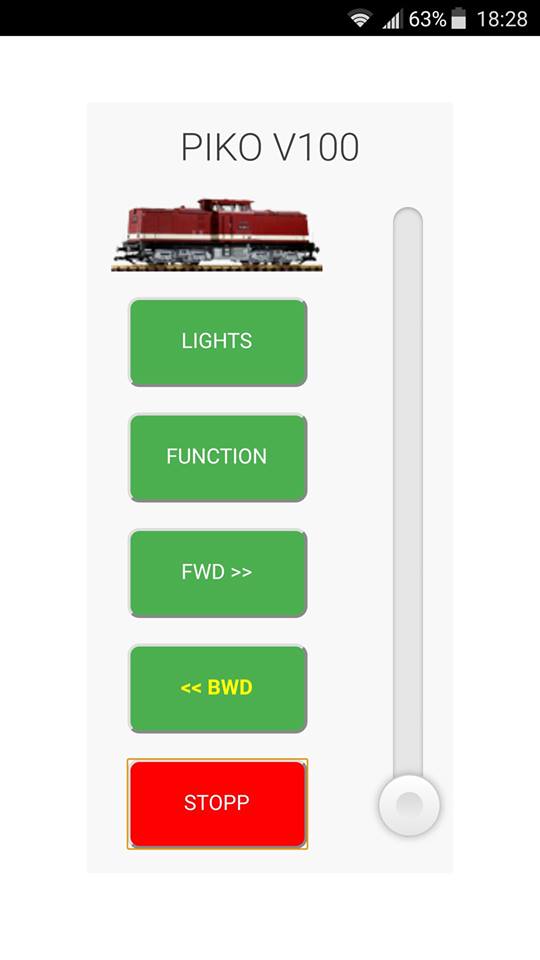
The nodeMCU – containing the ESP8266 microcontroller with WIFI functionality – is acting as webserver, that is getting connected to my private network. I stored all files such as HTML, CSS, javascript and icon and the SPIFFS area. While downloading the website a websocket connection is getting established from the browser to the controller, which is much faster than using the AJAX-technology. Using the slider, it is possible to control the speed of my locomotive. Using the “FWD” and “BWD” buttons, it is possible to change the direction. Controlling the lights will be next.
For all, who are interrested in the technology: I used the PWM functionality to control the speed. The websocket connection is not only working one way. As a usual webserver, it is possible to connect from several devices to the website. So it is possbile to control the locomotive from several devices in parallel. So I connected to the ESP8266 with my mobile, tablet and laptop in parallel. As soon as I move the speed slider on one of my devices, the slider on all other devices moves as well. Same for the state of the buttons (turned “ON” or “OFF”).
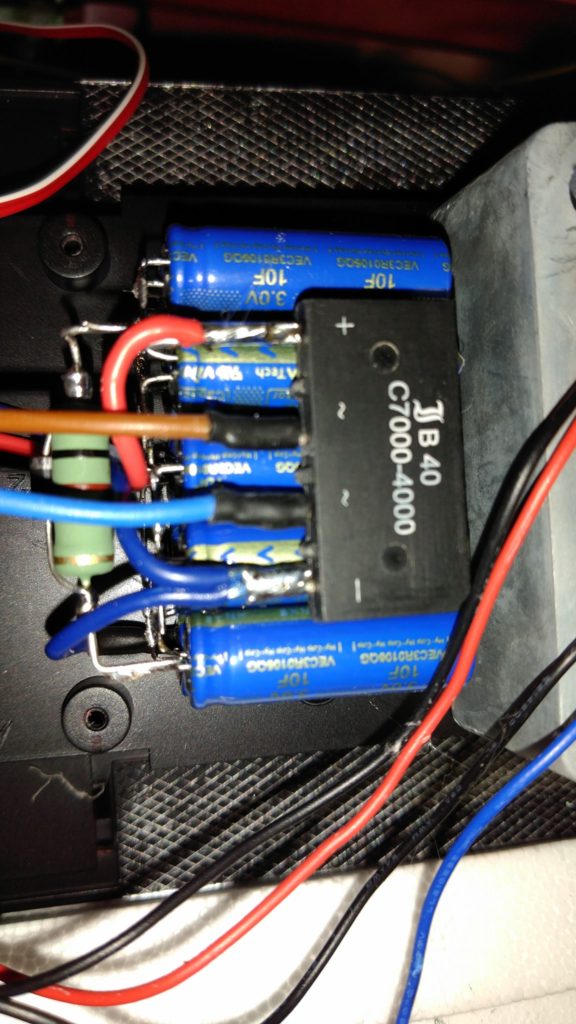
Since no boards from Bluerailtrains are available anymore, I am working on a development of my own WIFI based controller. The power supply of 10x 10F capasitors (in seria for getting 1F @30volts) and the L298N motor amplfier are already installed. The NODEMCU (development board containing a ESP8266-12) is also programmed as webserver including a websocket service to control the locomotive.
So I’m on the way to implement my first webserver on rails…. 😉
It hot today and you get sweat pretty fast. So not much work done this weekend. I’m also running out of material. So just a little dirt moved as preparation for the next few meters of tracks to be laid down.
I have one diesel locomotive left to get migrated to the Bluerailtrain decoder. One out of four. Now I wanted to order the very last required decoder and I had to understand, that Blueraintrains stopped their production. There is not one single decoder left on the market. Needless to mention, that I feel pi**ed…
I’m really disappointed, because it was an awesome solution and I already invested into three decoders for my remaining locomotives.
Well – what are the lessons learned? I need to develop my own decoders. Then I know, that I have them available, when they are needed.
Today I expanded the power capacity of my LGB Stainz steam engine from 4700uF to 1F. The power dropouts just sucks because of dirt of the tracks. Now – with the extended energy buffer – it is running smooth as not before. The investment of 12 Euros was really worth it.
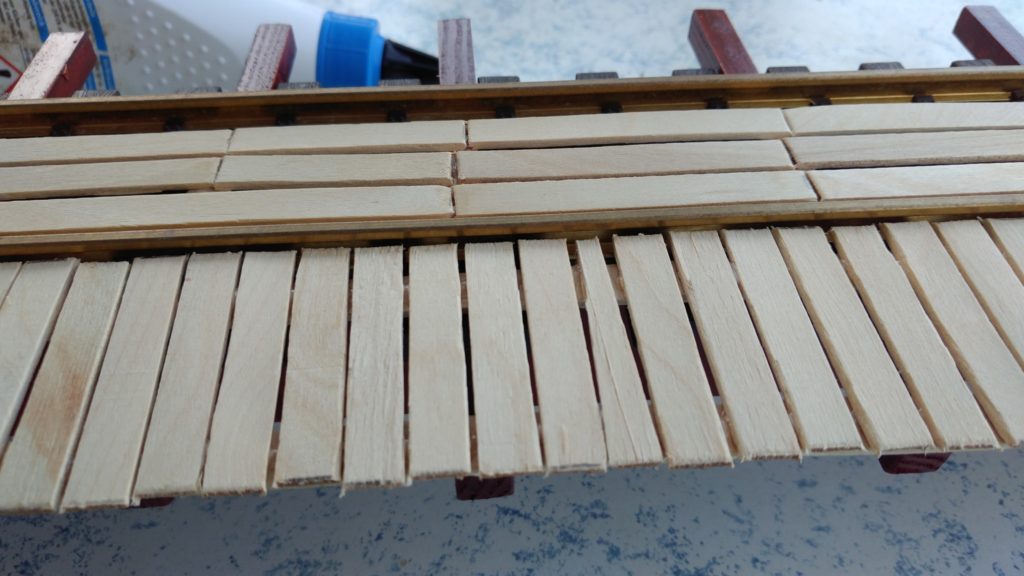
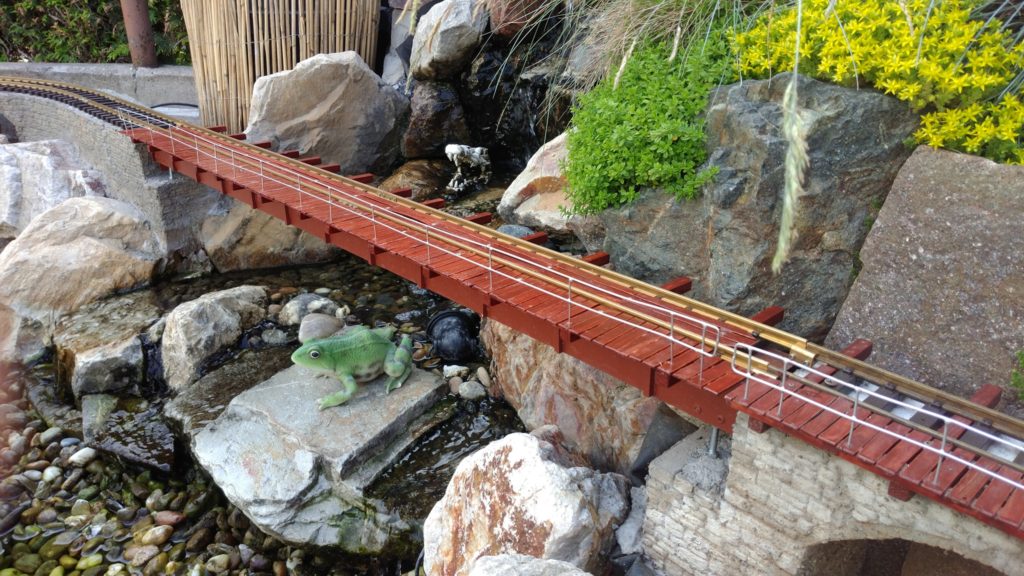
I made the bridge over the waterfall safe to walk over. I just took some wooden ice sticks, cutted and glued the together. Then some wood protection paint. Finally some electrical wires, cutted them and soldered them together for the sealing. Last step spraying the sealing in silver and put everything back in its final position.
Looks pretty natural for some small money….
It’s a perfect springtime sunday sunshiny weather today. So a very nice situation to make some photographs of my garden railway again….
Enjoy my little shots… 😉
The bridge over the waterfall is done. It did not cost more than 20 bucks. I found a piece of metal drywall framing in my basement. I just needed to by a 5 millimeter PVC profile, some screws and color. I worried a little, that the waterfall is loosing its attraction, but the metal profile is not too large and the color fits perfect into the scenery.
Today the weather was not too warm but sunshiny. So a good reason to proceed working in the garden after a busy day in office. Past weekend I prepared the framing for the other side of the bridge. This is made out of Jigstones. Last weekend I also made the basement out of concrete. Today I mounted the Jigstone framing on the basement. So I plan to fill the framing up with concrete the upcoming weekend.
The trick of todays task was to keep it leveled and aligned with the other side, that already was build last year.
