Inspired my Mark Found’s tv series “The Garden Railway”, I started building my own garden railway in my backyard. It is build right from the scretch.
I created this blog in order to share my experiances to interrested people, who also want to start with building up their own garden railway in their own backyard. So every comment and feedback it apreciated.
A garden railway is a great possibility to combine nature and technic in a home environment. It is also a great hobby to free up the mind from daily business. And it is completely different to smaller inhouse scales, because everyone starting with this hobby has also think about weather and stability, security and many other impacts. Working with garden railways needs rockery work, concrete mixing, gardening, and way more.
Please enjoy my little blog. I hope, that I am able to share some good inspirations.
Next step up the hill done! This time I did not use rocks to seperate earth and gravel. I used metal plates. I bendend them and hit them into the earth. Then I put off the earth in between and fill them with foil and gravel, as I did before.
This technic is easy and it helps to keep the gravel and the earth seperated…
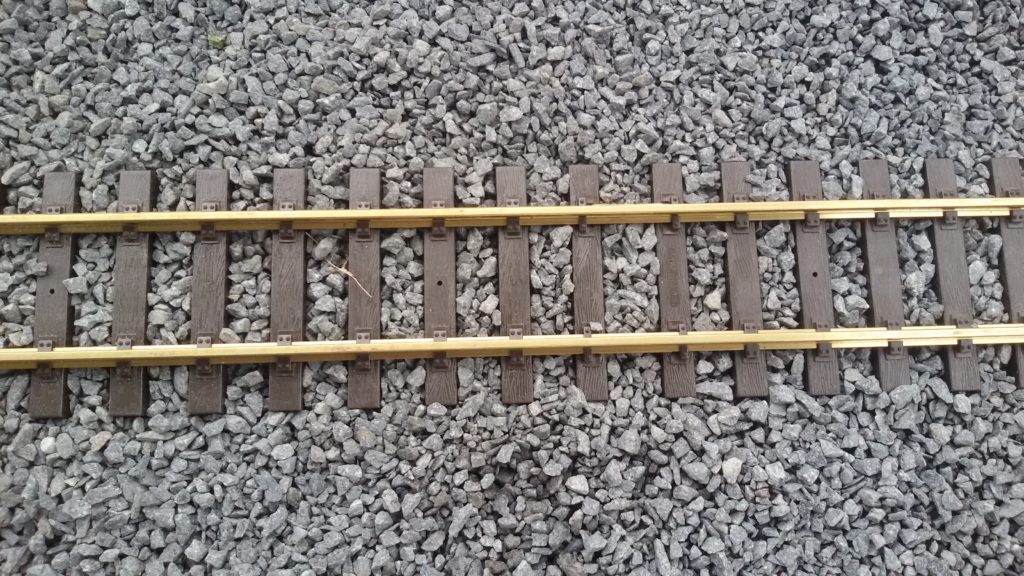
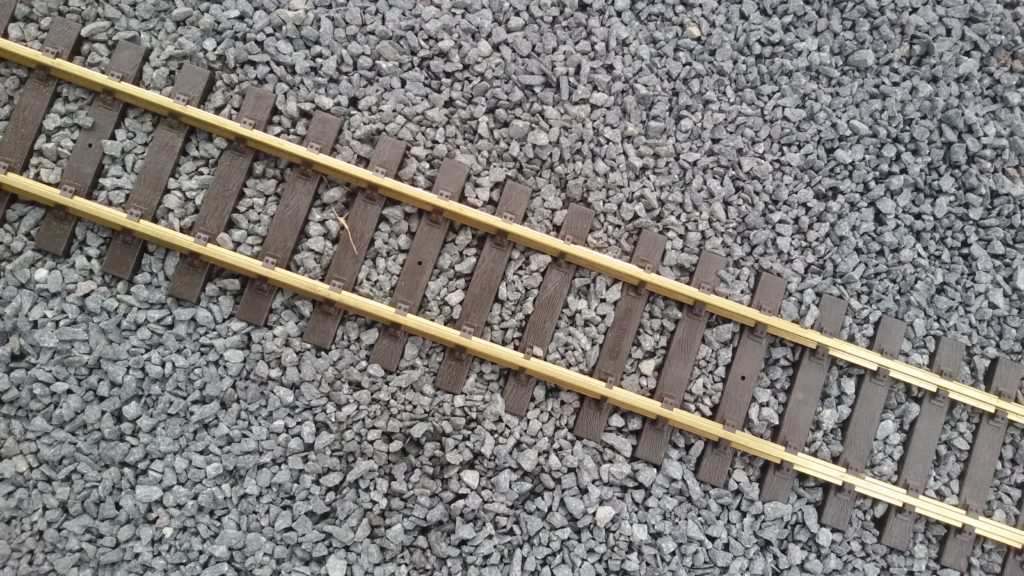
First 3 meters (9 feet) of laying tracks done!
I used to dig the earth away a little, but a foil down below against weed put around 10 centimeters gravel in and added some concrete plates on. Then I screwed the tracks to them, and finally put some gravel between the sleepers. The result is pretty perfect!
Just to support the electrical power supply, I hide a plastic tube in the gravel in parallel to the tracks. The aim is to connect the tracks every 2 to 3 meters with the parallel power supply – just to garantee a good connection.
First installation of a half circle with a grade up to the planned station area. Well – I have learned, that creating a garden railway is a hard job, with earthworks, concrete, setting stones, etc.
But I think, as soon as it looks integrated into the garden, it is absolutely worth it! As long as it is under construction, is looks like a toy. But as soon as we put some flowers and grasses in between, I think it will look really great!
With some support from the local garden center I bought some grasses and flowers. I also added some underwater lights to the edge. Now it looking quite more natural – even more awesome at night.
Springtime has come! Good time to proceed in the garden!
First water feature build at the edge of the garden. The blank earth is still showing through, but it is just a matter of days, until I will get it looking better….
In addition, I installed some power plugs to control the lighthouse and the pump using a Raspberry Pi. This one os mounted in the garage and setup as a webserver. It is caluculating the sunrise and sunset everday and will turn on the lighthouse at sunset and shut it off again at 11pm. But that was another project….
Some tempoaraly track laying in front of the upcoming waterfall feature. That was a hard work with cutting and setting stones exact vertically in to the edge of the backyard. I got fixed in concrete.
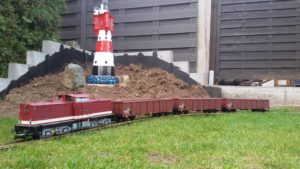
Just for this photograph, I added the lighthouse to it, we bought during the summer holidays in a town close to the german northsea coast.
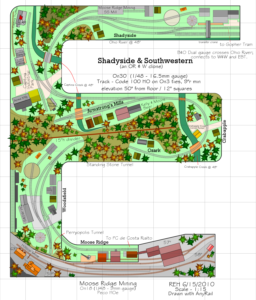
Fall has come and the time for gardening ends up. Now it is a good moment to start the planning in the warm and dry living room. I tested some railway planning software, but I stopped researching at “AnyRail” – a product from the netherlands.
It has several advantages:
– it is payable
– it contains the G-scale tracks I need by default
– it is easy to use
– a license contains software updates up thru the next major release.
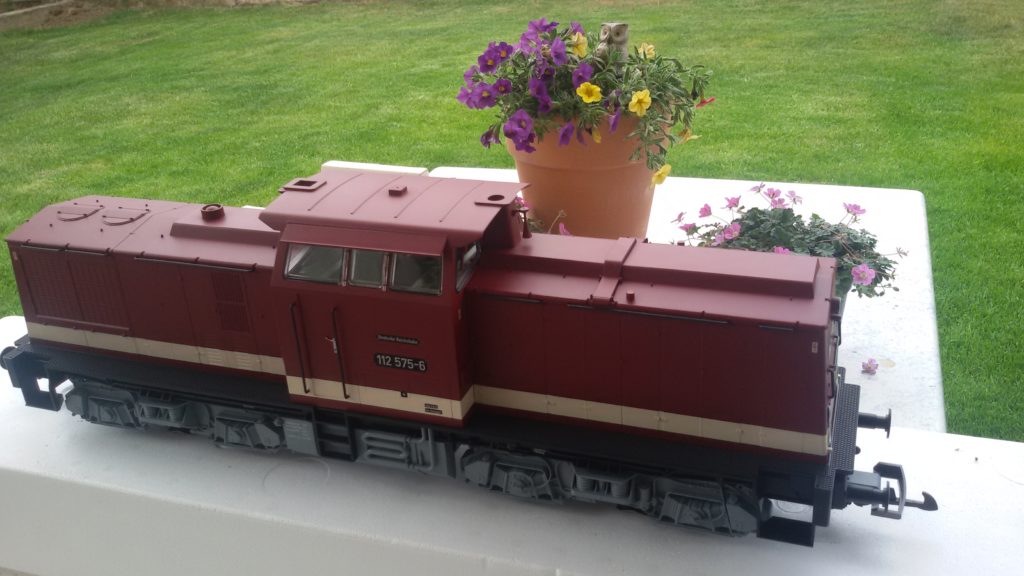
Anew loco is now called mine. It’s a PIKO V100 diesel engine. The bottom is looking a little much too plastic for me. So I decided to pimp it a little by painting. I have left some Revell color in my basement. So why not get some some color on that gray plastic?
First run on gras in may 2015. Just to get a feel for size and speed of the G-scale railway. I already bought a VT98 from PIKO. So I enjoyed running it in my backyard. Nothing fundamental done up to now. No further ideas about controlling multiple trains – just an analoge tranformer.